Drawing Fall Leaves (part 2)
This drawing method can be used to draw anything. Use your imagination and apply this drawing sequence to such natural beauties as house plants, evergreen leaves and spring flowers! I discovered that blackberry leaves are the last leaves of the season to turn wonderful colors. They are sturdy when on the vine but curl, turn brown and dry fairly fast (within 24 hours) after they have been picked. Blackberry leaves become striped when they turn from green to golden with reds, oranges, and yellows!

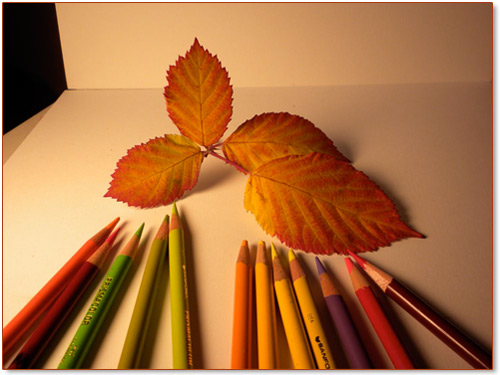
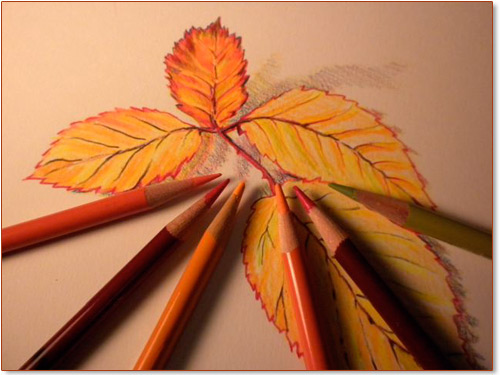
1.The leaves that I picked for this still life were blackberry leaves. They did dry before I was finished and I replaced them with a similar group fresh off the vine. You'll see this as you scroll further through this Drawing Free Ezine. Originally there were 5 leaves in this group and I clipped off the leaf that would have been between the two lower leaves. You can see the mini stem left where I cut the leave off. When I replaced this group with a fresh group of leaves I clipped the same leaf off again. I clipped off the leaf to make my composition feel stronger and more dynamic to me. It is a feeling thing -- not a rule! Here you see all the colors that I am going to use to make this composition. Later, in addition to these Prismacolor pencils that you see here, I also used a dark brown and a fairly dark blue. I found that I really needed all these pencils to be kept sharp!
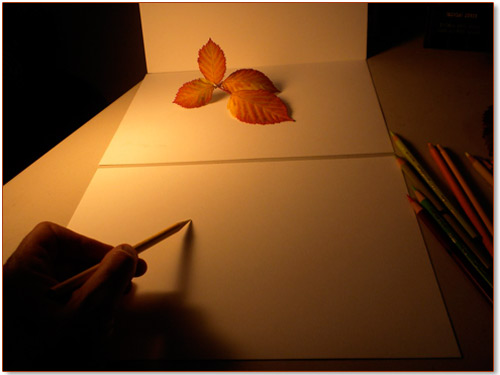
2.OK, here we go. Starting is always exciting and a bit unnerving until we just relax and slip into our Drawing Zone. I did not do any pre-drawings in graphite or colored pencil -- but the "this doesn't really count" pre-drawing stage is highly recommended. You can also decide in a "be nice to yourself" way that the first few that you start and even keep working out are for exploration and understanding of the subject, the position and the light - NOT the final drawing. Use this highly beneficial and "low stakes" drawing time for exploring, practicing and understanding the connection between your technique and the visual demands of the subject.
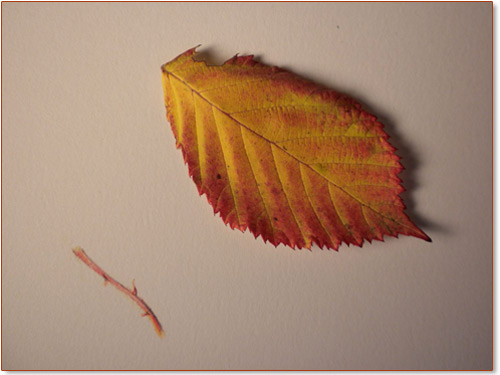
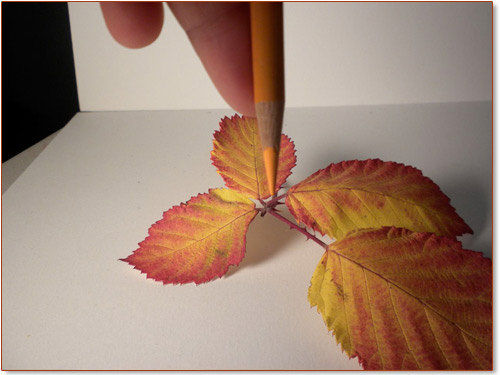
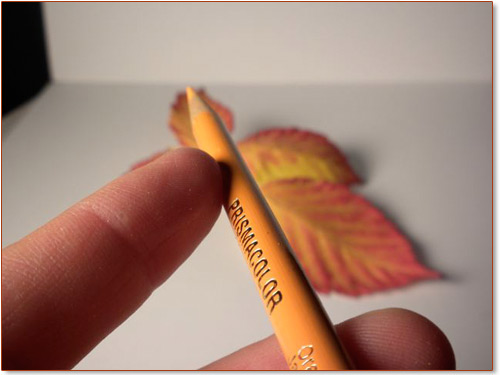
3.I'm starting here with the stem. Rarely would I start with just one part. I am (almost ) finishing this part of the drawing BEFORE I lay in the rest of the drawing. It works well HERE because it is in the CENTER of the leaves and thus in the CENTER of the drawing. This stem IS located in a position where everything else CAN revolve around it. When you SET something like this FIRST there is no going back . Colored pencil does NOT erase out. When you draw something that cannot be erased out you have determined the scale of every other thing in the entire drawing. Now all other aspects of this drawing have to be in relationship to the size of THIS drawn stem. The size of the stem creates the scale for the entire drawing -- IF everything will be drawn to the same scale. Drawing everything to the same scale creates realistic proportional relationships or "correct proportions". You are the artist and you don't have to follow any rules -- but knowing how the real world looks when viewed from your real eyes does help! I put the leaf that I cut off from the group of blackberry leaves here next to this little part of the drawing so that you would have an actual reference for the size of this drawn stem. Note the change in color and value as the stem turns. Also look for the way the thorns are shadowed even though they are tiny. Keep your pencils and eyes SHARP!
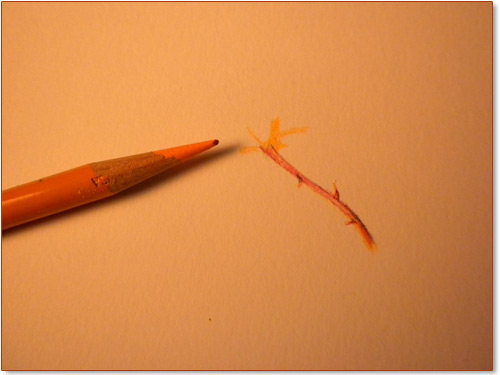
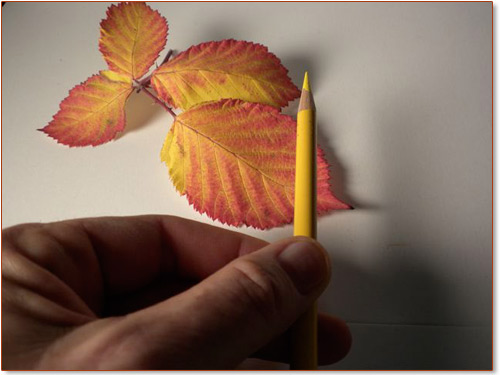
4.Here is the stem up close!
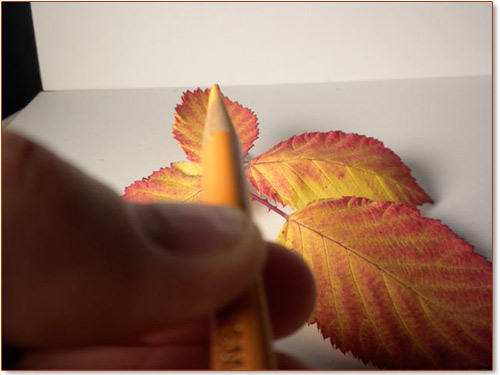
5.I'm going to expand out from this central area where my pencil is pointing. I will start with drawing the top leaf. I am also "sighting-in" here. Sighting-in involves measuring how long to make this leaf. Just placing your pencil as I am doing here helps you really look and see what kind of size your are dealing with and how to approach what you see.
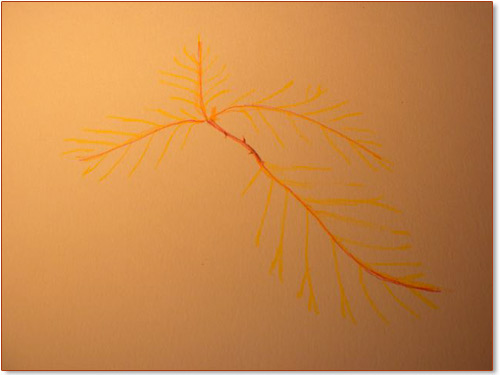
6.With a LIGHT yellow -- I am feeling my way through the subject matter and thus the drawing. I am organizing where all the other stems will come out of the top of the already drawn stem.
7.Getting ready to draw the leaves! More sighting-in, measuring and proportional size comparison and LOOKING.
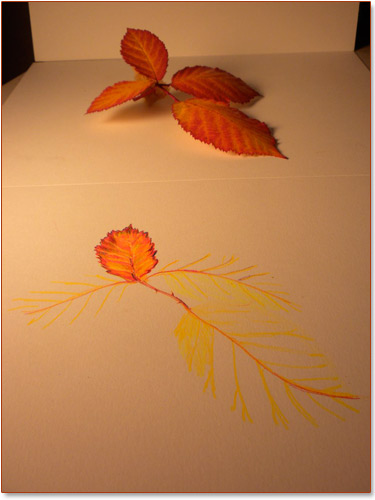
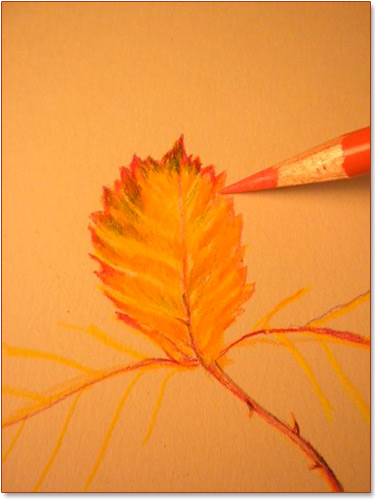
8.The main central stems are laid out for all four leaves. The outer edges of each of the leaves are found by drawing outwards along the secondary veins from where they originate on the central vein. Again, I am drawing the secondary veins OUT to the edge of the leaf where they end.
9.Drawing the top little leaf as best I can and taking it to (almost) completion. It's OK for me to see and realize that my drawing is not photographic. For example, you might notice that the leaf in my drawing doesn't curl as it does on the left side of the leaf in the photo. Another difference between the little top leaf in the photo and my drawing is that the outside shape and line/edge of the leaf is not as it "really really" is in the actual leaf. But this is a drawing. It is fun to draw by observation. Plus, drawing by observation of the actual subject matter grows and develops all of your drawing skills. Drawing is NOT photography -- although photography can always be used to make a more precise and photo realistic drawing or painting. Drawing by hand using your eyes directly without the assistance of photography brings OTHER qualities to the picture. I used no photography to assist in making this drawing. The photography used here in this ezine allows me to share the process of making this drawing with you.
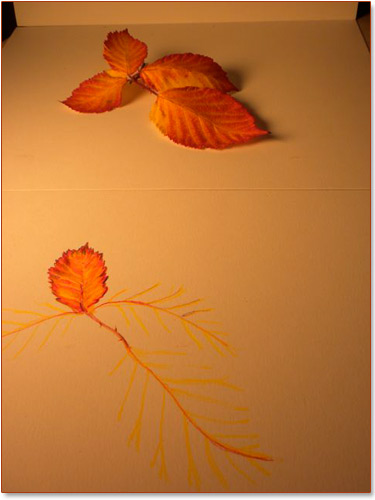
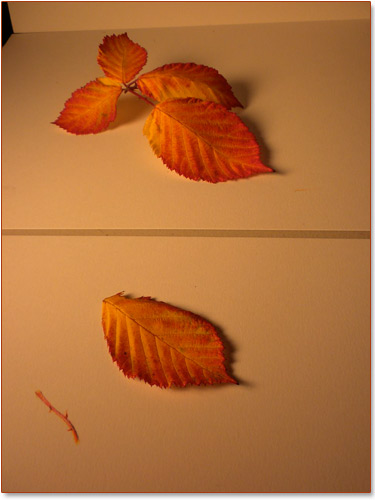
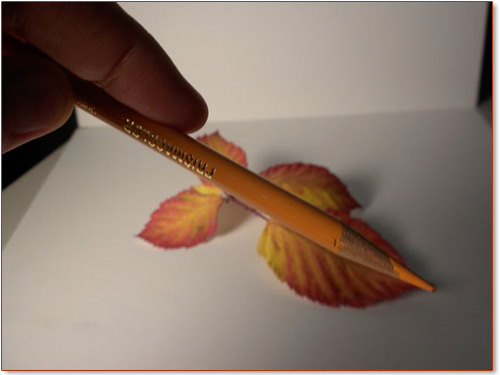
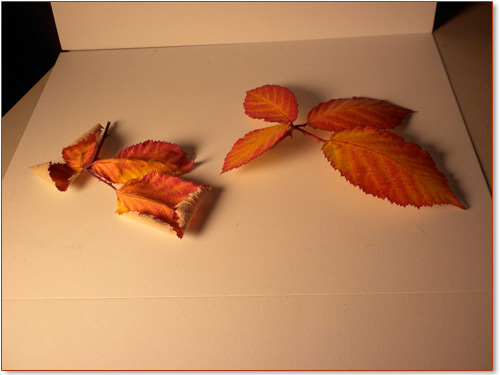
10.Dealing with the ever changing nature of nature! Before I finished the drawing my leaves dried and curled. I replaced them with similar fresh leaves!
11.Ready to start again and continue on with the in-progress drawing and the new still life.
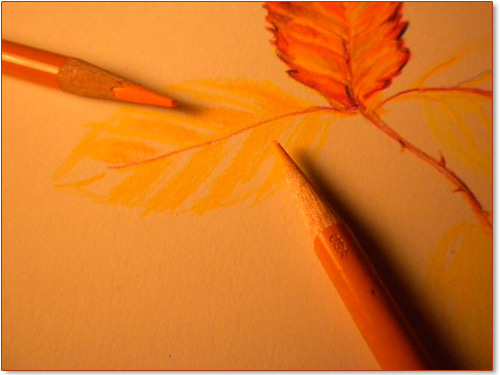
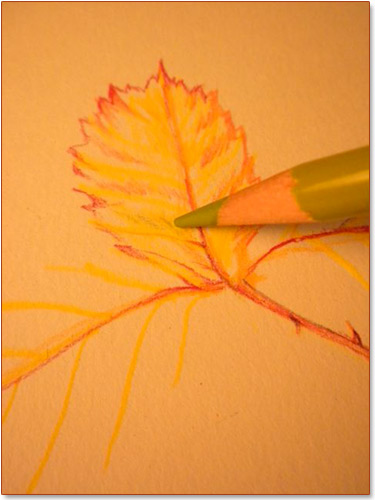
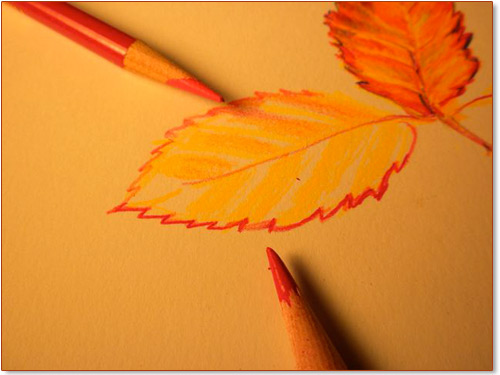
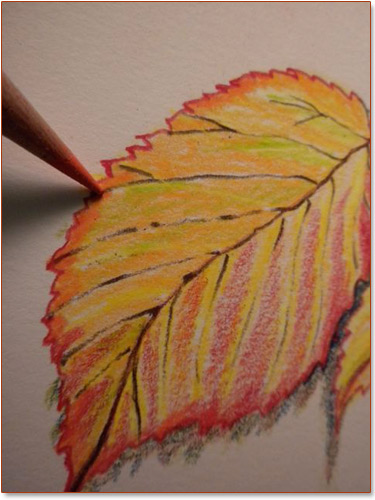
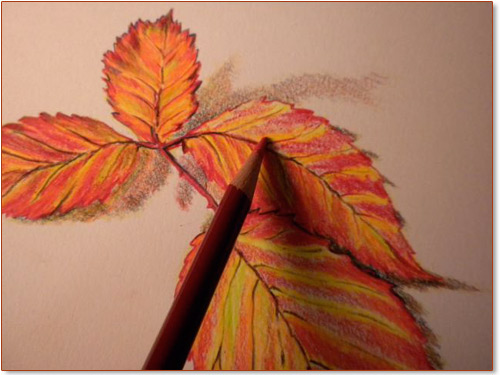
12.With a light yellow, I draw from the center stem out to the edge of each leaf. Then with slightly darker yellows that verge on orange, I start to lay in the stripes of the leaves. I am continuing to notice more and experiment as I go. Nothing is finally committed or set yet. When I know where the leaf edge is and I am satisfied with the outer contour of the leaf, then and only then do I make the edge. Notice here in the last photo how I made the CLOSE to the viewer (AKA the lower) edge darker, wider and also a more intense color. I made the BACK/higher edge lighter, thinner and a less intense (more dull) color. This will help bring the front edge visually forward and help push the back edge visually back.
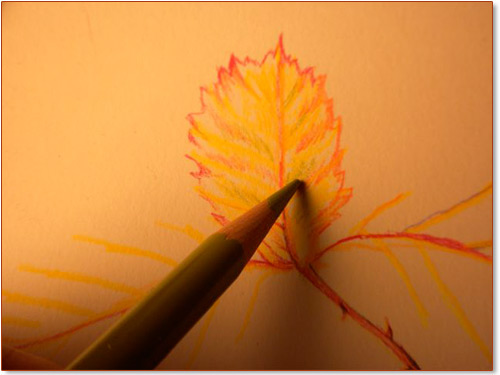
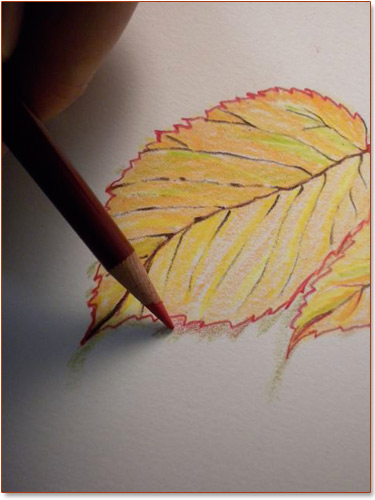
13.Now you draw your outlines. At this point, these outlines are "known quantities". I know where they go -- I'm not guessing as I would have been had I drawn them first.
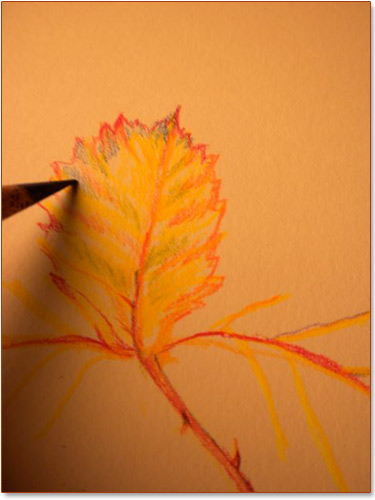
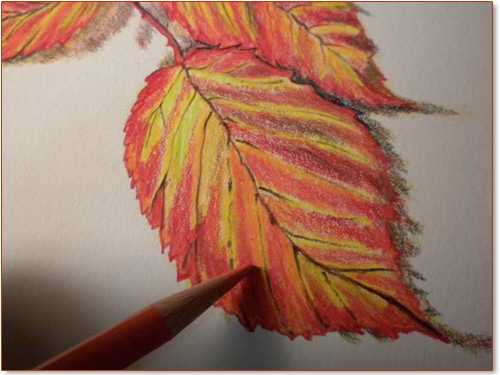
The edges are now drawn so they are clear enough to see for sure. Next, I draw in the colors on the leaves as I see them. You are still working to see what is "really really" there in the leaves. Be careful to not just find one thing that works and then keep working that to complete it all in the same way. Stay alive and stay alert and stay in your drawing and seeing zone. Layering the color is really the key to working with all art media -- including colored pencils.
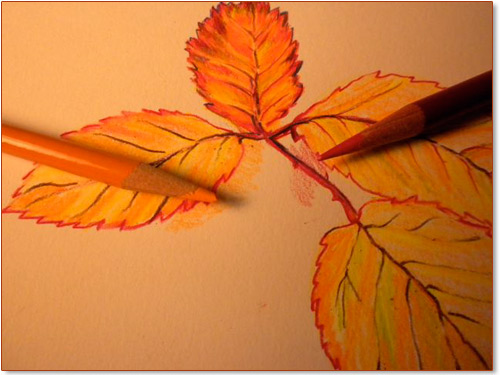
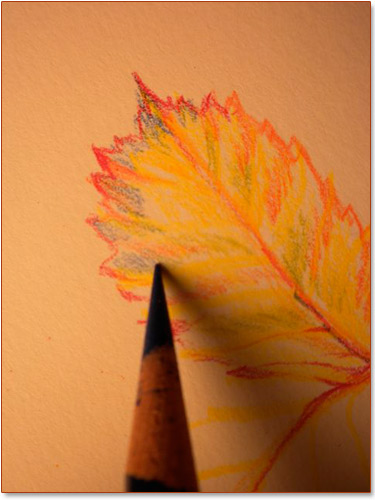
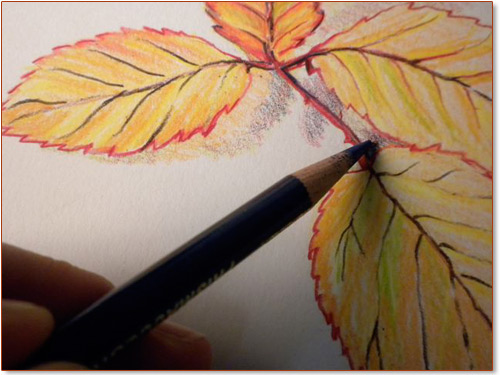
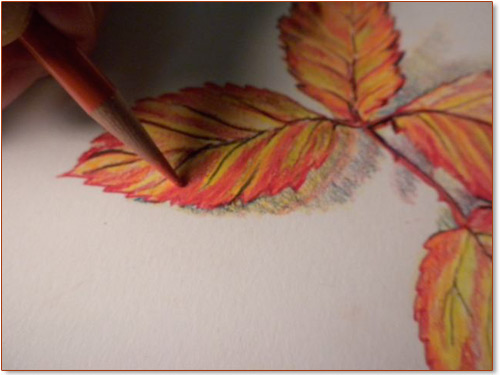
14.Time to draw in the shadows. This actually could have been done earlier -- but no later. Don't wait too long to work on your shadows or they will look as though they are separate from the subject matter. In the beginning when you are drawing (and sometimes a long way into a drawing practice) people look at each part of the drawing as a SEPARATE part. The shadow must be seen, so to speak, in the light of ALL of the subject matter. In other words, the shadow is a vital part that must be drawn so that it doesn't stick out or disconnect from the whole drawing. The shadow must also belong to the surface that it is falling on. And the BIG DEAL is that the shadow must stay BACK and lie DOWN below the subject matter. The order of this sequence in the real world is (1) light (2) form that blocks the light and (3) the shadow or darker areas and darker spaces that result from the blocking of the light. Even if the shadow looks black or dark blue to you -- don't go there! I drew these shadows and some reflected colors that are there are with the same colors that made the leaves. The colors are gently "teased" in and layered to become a neutral gray. (Grays are always neutral but I like to say "neutral gray".) Look and you will see that the various hues and values of the shadows are the same value or a slightly darker value than the leaves.
NOTE: In the beginning some students will leave an undrawn space between the leaf and the shadow. Check for this and close the gap or white "outline" if you have this tendency. Be sure to feel as though you are sticking the shadow UNDER the leaf. Make sure your shadow goes right up to or even ever so slightly into the leaf. Again, use multiple light applications of multiple colors to make the shadows. Look closely at the shadow and vary the color and the value as much as possible while still having the shadow appear to be a consistent darker neutral hue. Do NOT outline your shadows before or after you start to draw them.
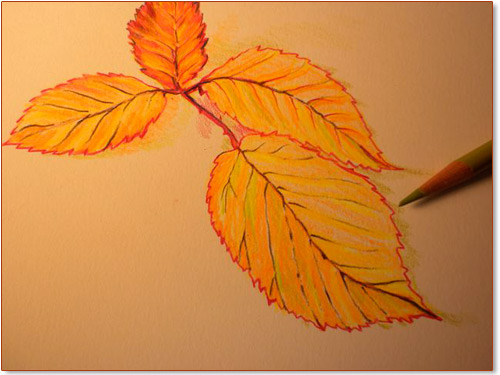
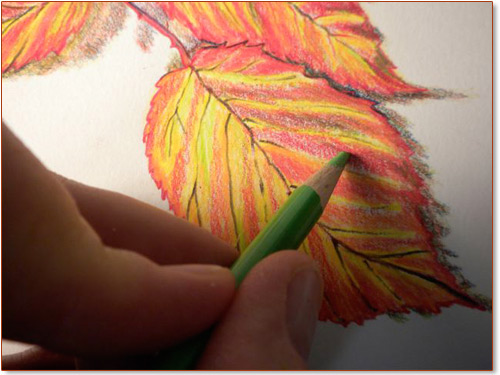
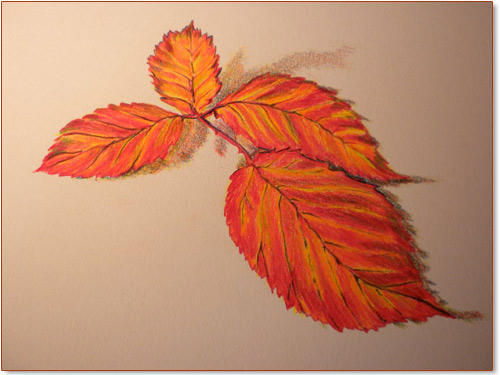
15.The leaves are finished in more layers using the colors that you see in each photo. You just keep working it in small steps so that you keep control of the development. Let colors layer and create many small variations of color throughout your drawing. Don't rush to get to the end. On the other hand, if the drawing is turning out to be one of the best drawings that you ever made, you might be afraid to take it any farther. Beginning drawers are a bit hesitant to possibly ruin the drawing by going too far. Don't worry about this -- just take it easy and enjoy!
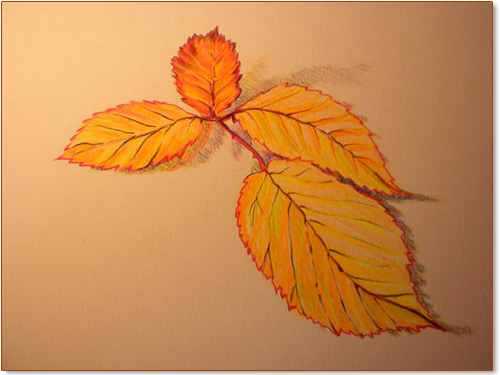
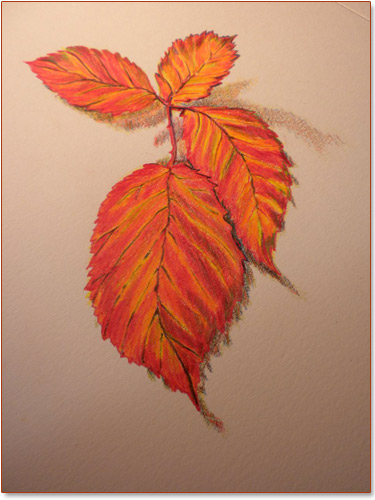
16.Here you have two views of my finished Fall Leaves drawing. Be sure to post or display your drawings so that you and your friends can view and enjoy your drawings. Draw more leaves or other subject matter using this method and you will notice how your ability to draw keeps improving. Feel free to send me scanned in photos of your drawings.
NOTE: By sending your drawings electronically or in person you give your full agreement and total permission for Drawing Free to publish and display your drawings on the Drawing Free website. Drawing Free assumes no responsibility for any unauthorized reproductions of said drawings. To send drawings or feedback click on "MAIL US SOME FEEDBACK" below (you may have to scroll down just a bit). Any feedback that you have on this or other EZINES on the Drawing Free website is greatly appreciated! Your own stories of your successes with these methods will be welcome as well. Happy Drawing!
For more information on Margaret Welty go to: www.margaretwelty.com -- but first SIGN-UP HERE FOR THE DRAWINGFREE EZINE.
Copies of each issue for DrawingFree Ezine can be found on the DrawingFree Web-site:
www.drawingfree.com
Copyright 2010 Margaret Welty. All Rights Reserved. Permission is granted to link to this site, information or to quote WITH author notation: "From the Drawing Free Ezine Created by Margaret Welty at www.drawingfree.com".
DRAWING FREE - ART FROM THE START
Presented by Margaret Welty and the Drawing Dog
Each lesson presented in the Drawing Free Ezine gives you ways to massage your own
neurological white matter to further form and train your ever transitioning ART BRAIN.
Remember that the key is to DRAW, play and be easy with yourself. Eliminate any
unrealistic expectations and judgements about your work. Work to be happy while
you draw! Draw like a child with no expectations beyond your current beginner's
brain, eyes, hands and heart. Orient your focus toward the fascination that consumes
a small child upon discovering that she can make her own marks appear. Make your
own marks appear!!
Create a chance to draw. Draw every chance you get.
Make a space to draw. Draw in every space you make.