Format + Water + Color = FUN
THE WATERCOLOR SQUIGGLE in a FORMAT
This exercise alone will teach you how to draw and paint by just doing this often. You will be amazed at how your technique will change as you work this way. Be sure to include the format first in every drawing that you make!!! Over time this becomes second nature. Small paintings teach you everything that you will need to learn to eventually change mediums and change to larger or different formats if you want. ENJOY!

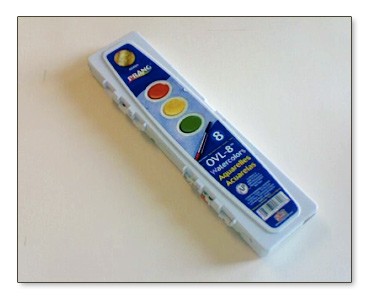
PAINT

The less expensive sets -- probably including this set -- can not be counted on to be particularly light fast -- and any paintings done with these inexpensive sets may fade more quickly when hung in or near sunlight and may fade over time in any case. You can use finer and more expensive watercolor sets or tubes of watercolor -- any that you want to use will be fine.
Make sure that your set has a deep blue, a really red red and a yellow that is very yellow and not a mustard color. You also want a green that looks like a healthy grass color, an orange like a real orange and a darker violet or purple that can look almost black. You don't need white. In the transparent medium of watercolor the white comes through the color from the white of the paper.
All other colors that you might find in larger or additional sets can also be used and may add to your painting fun. After you have your basic colors: blue, red, yellow (called the primary colors) AND green, orange and violet or purple (called the secondary colors) -- there are no wrong colors and MANY, MANY colors can be mixed and layered with your transparent watercolor paints.
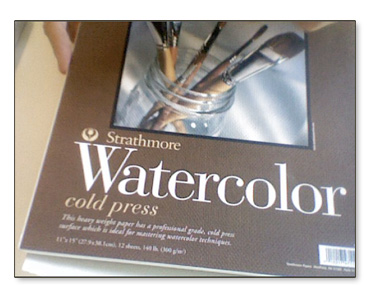
PAPER

The paper that I am using here is paper from a 11" x 15" Strathmore Watercolor "cold press" pad called "heavy weight" paper It is not that heavy unless you are comparing it to computer printing paper. As watercolor paper goes, it IS on the lighter weight side.
The thickness of watercolor paper is indicated by the weight in numbers. This sheet of watercolor paper is 140 lb. weight. A 300 lb. paper weight is the standard heavy weight for water color paper. When painted on even with very wet brushes the 300 lb. paper will not buckle much. "Stretching" lighter weight watercolor paper is possible to keep it flat while you are working it (search tutorials out on line for a demo).
It is not necessary to stretch this paper here because we are just playing and the paper can be flattened later if you want. This particular piece of paper also is called a "400 Series" which means (in this brand) that it is acid free (archival) -- thus it is going to last longer -- but for what we are doing that isn't at all necessary. This brand's "300 Series" is not acid free -- costs less usually and is fine for what we are doing. Each brand of paper will describe their paper differently -- not to worry!
Another Note: Different papers will have different textured surfaces and absorbency as well as the ability to "hold up" to lots of painting and possibly some scrubbing or lifting of color OUT -- experiment with many papers to get a feel for each over time.
My students in my Art and Children class (adults learning how to teach art to children) are usually true beginners and they LOVE when I give them a piece of 140 lb. watercolor paper from my stash to try -- they are instantly hooked on the texture, the way the surface handles the water and the extra weight of the paper compared to what they may have painted on before. Can't paint just ONE!

BRUSHES

Brushes have numbers and as far as I can tell the numbers no longer have much relationship to the size outside of each brand and type. Don't worry about the numbers unless someone has suggested a very specific brush.
For watercolor you want a "round watercolor brush" made out of sable, some sable or no sable. No need to get sable which is expensive. A nylon brush is fine as long as the quality and craftsmanship is there. A ROUND brush is the type of brush that comes to a point and the metal holder for the bristles is ROUND.
Here I am using either a sablette (nylon) or a red sable blend (blended with nylon). They are very similar brushes. They are both called #10. The blend is a Utrecht #238. The nylon brush is also Utrecht -- number #228. Very simple stuff. Get what looks to you like a small, medium and large round brush for your watercolor painting. You may also enjoy a flat brush -- make sure the the bottom of those brush hairs also come to a fine edge and not a blunt chop.
STARTING WITH A DRAWN FORMAT

I drew a rectangle using graphite pencil lightly. You can draw your format any way you want and use any media that you want. I like to start with a light line that won't ultimately show and may be erased out later -- usually even through the (dry) watercolor later.
Working within a format will help you to become sensitive to the very important relationship between your inner design (what you paint) and the outer edge of your work (the format). All viewing includes the total design which includes the edge or the "outer limits" of your drawing or painting as well as what is painted on or inside the edges. This is the overall picture!
A SIMPLE DESIGN

WATER TO WET THE PAPER - IF YOU WANT

You can paint "wet into wet" with the first coats of water being water WITH pigment (rather than just clear water).
PAINTING WITH THE COLORS IN YOUR SET
When I open my set you see that I've already opened it and used it before. I don't clean out the set each time because I like to use the colors that have been mixed before in the tray. I also don't clean out the set because it uses up the paint really fast to be scrubbing the pigments clean and thus pulling too much paint out of the set just to clean it. There are those that will want to do this -- and you know who you are -- and that is OK.
The lid of the water color set becomes a little tray to mix colors in when it is open. You dip your brush into water first and then the paint and pull some paint out (on your brush) of the little pot of paint. Sometimes when I start to paint -- I wet out all the paints first. You can do this by spraying the watercolor set with water with a spray bottle -- or by putting a drop of water into each the little tray or oval of each color. It takes about five minutes to soften to where it can be used easily. You can also soften the paint as you go into each color.
I'm starting to paint the design with a yellow on one side of the squiggle. Just watch as I put it in holding the brush in different ways that work well with the areas that I am painting and the position of my paper. In the very first section it looks like I got more yellow in there in a thicker, deeper color and less transparent way than I wanted and I went back in with a clean and a dryer brush (wet but not very wet) to lift or pull some of it out -- sort of mop it back out with the clean brush.
As you work you will learn all this over time -- just painting and watching and not trying too hard to get something real specific -- the looser you stay at first -- the better. Be easy with what you are doing and you will learn by doing and watching what happens.
I continue to paint -- mixing colors in the tray and bringing them out over and around other colors that are already painted. When I paint the second side of the squiggle, I leave a little DRY white space of paper so that the two sides don't run together. I could have also let one side DRY completely before I painted the paint next to the line. In that case, the wet from one side would NOT attract and mingle with the new wet from the other side. Wet runs to wet -- not dry unless it is SO MUCH wet.
Soon after leaving the dry white dividing line, I do put water with color into that dividing line and let water and thus colors that the water is carrying run together. I started this line with blue and made it change to purple and then orange as it wanders through the center of the composition. The whole paper can be tilted different directions to encourage and direct the excess water to more places that you want it to run or move.
I'm also using some splattering with the painting. A little into the splattering I realized that it might be good to lay down paper along side the outer edge of the format to prevent the splattering from going outside the lines of the format. This masking of the outer edges could also be used as a technique with sprayed water and color to make patterns of fine spatter. EXPERIMENT!
WATERCOLOR CLEAN UP
DAILY PRACTICE
For more information on Margaret Welty go to: www.margaretwelty.com -- but first SIGN-UP HERE FOR THE DRAWINGFREE EZINE.
Copies of each issue for DrawingFree Ezine can be found on the DrawingFree Web-site:
www.drawingfree.com
Copyright 2010 Margaret Welty. All Rights Reserved. Permission is granted to link to this site, information or to quote WITH author notation: "From the Drawing Free Ezine Created by Margaret Welty at www.drawingfree.com".

Presented by Margaret Welty and the Drawing Dog
Each lesson presented in the Drawing Free Ezine gives you ways to massage your own neurological white matter to further form and train your ever transitioning ART BRAIN. Remember that the key is to DRAW, play and be easy with yourself. Eliminate any unrealistic expectations and judgements about your work. Work to be happy while you draw! Draw like a child with no expectations beyond your current beginner's brain, eyes, hands and heart. Orient your focus toward the fascination that consumes a small child upon discovering that she can make her own marks appear. Make your own marks appear!!
Create a chance to draw. Draw every chance you get.
Make a space to draw. Draw in every space you make.